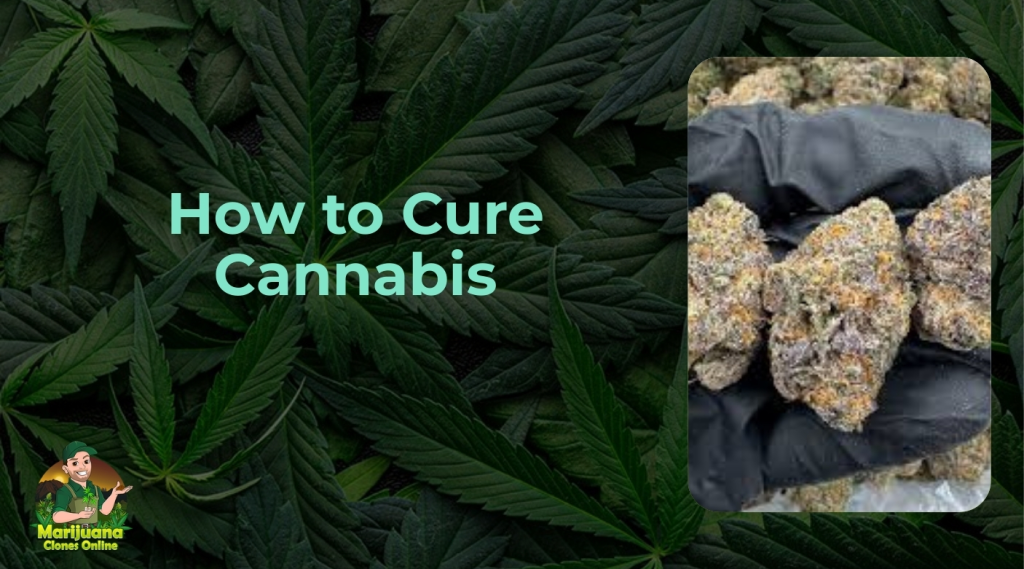
Cannabis growers know that a perfectly grown plant can still end up tasting like hay.
Let’s explore how to avoid this by learning how to cure cannabis properly.
As you know, harvesting marks the end of cultivation. However, it is the beginning of chemical transformation. So, the way you cure cannabis determines whether you’re unlocking rich aroma, smooth smoke, and full potency, or throwing all that effort away.
This guide breaks down the curing process into precise, actionable steps designed to bring out the absolute best in your buds. If you’re looking for premium, perfectly cured cannabis, look no further than our premium THCa flower collection today!
What Is Cannabis Curing?
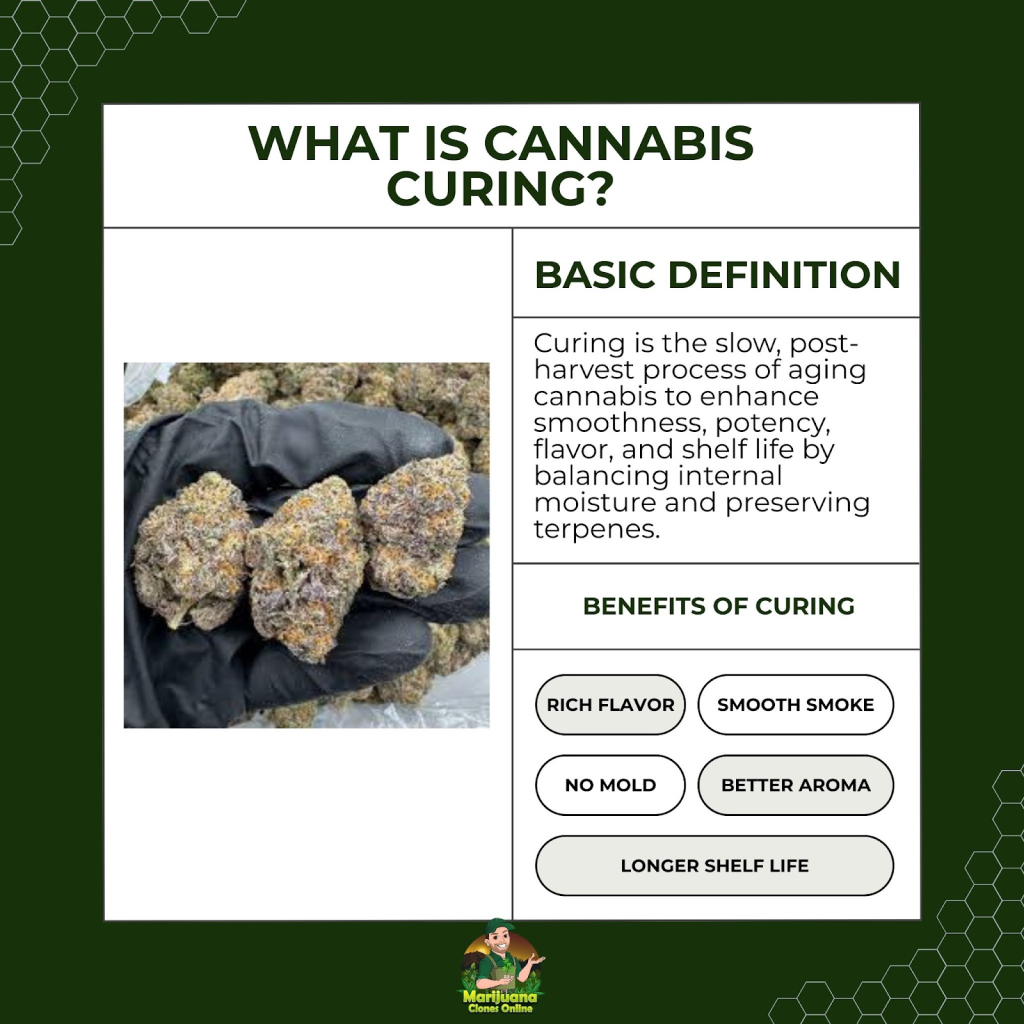
Curing is the controlled post-harvest process that transforms raw flower into smooth, potent, and flavorful cannabis. After trimming and drying cannabis, your buds still carry residual moisture deep within. If you rush to jar them or leave them exposed, the end result can be harsh, grassy, or moldy.
Curing solves that by slowly drawing out internal moisture in a sealed environment where cannabinoids and terpenes can stabilize, chlorophyll can degrade, and the aroma can finally come alive.
Think of it as aging fine wine or slow-smoking a brisket. This is where chemistry takes over and brings out the best in your grow. The difference between a harsh cough and a smooth exhale often comes down to curing. Flavor, shelf life, and smoke quality all rely on this overlooked step.
How Long Does It Take to Cure Cannabis?
Curing cannabis is not a quick job. It takes patience, and more importantly, consistency. Most flower reaches peak quality between three and eight weeks, depending on strain density, moisture content, and your specific environment.
Some growers notice a smoother smoke by week three. Others keep their jars sealed and burped for up to two months to deepen the aroma and flavor.
During the first week, buds release the most moisture, which makes daily jar checks essential. By week two, the internal environment starts to stabilize. If the humidity stays within range and no signs of mold appear, you can reduce burping frequency and let the flower continue curing undisturbed.
Certain dense strains may need extra time. Their structure traps more moisture inside, which requires extended curing to fully develop their terpene profile without risking mold. Autoflowers, on the other hand, sometimes cure faster because of their lighter bud structure.
Step-by-Step Guide to Curing Cannabis
This is where the work pays off. You’ve trimmed your plants, dried your buds, and now it’s time to cure with intention. Follow this step-by-step process to lock in potency, bring out complex aromas, and make your final product burn smooth every single time.
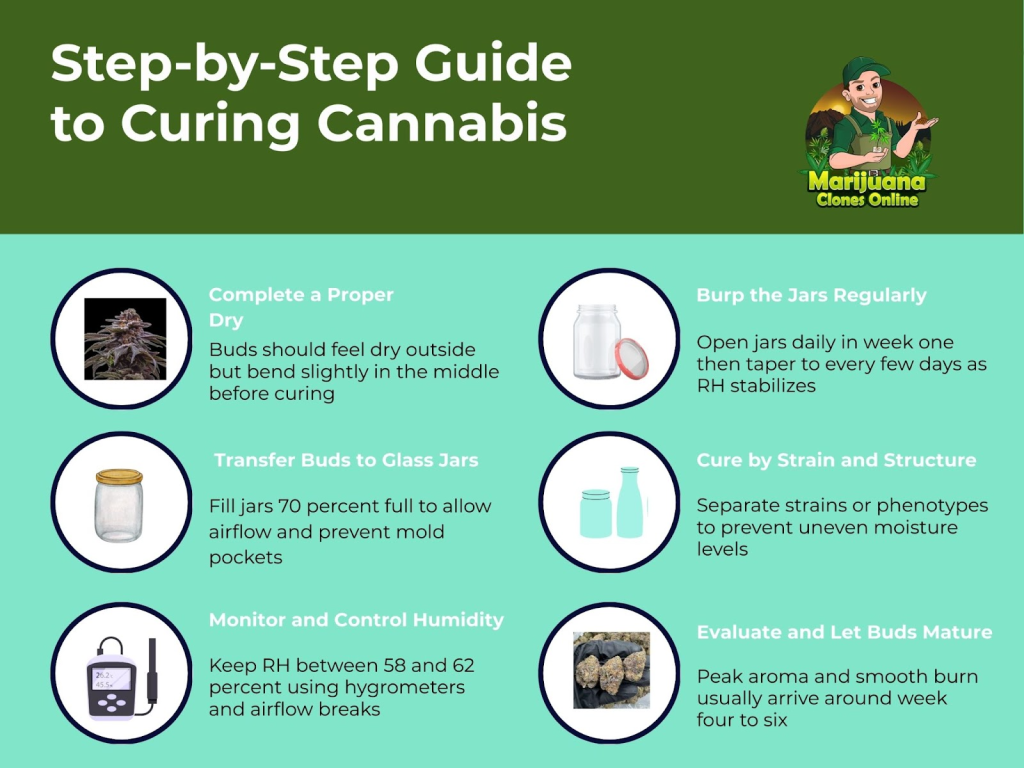
Step 1: Complete a Proper Dry Before Curing
Curing only works when drying is done right. Your buds should feel dry on the outside but still bend slightly in the middle when you test smaller stems. They should not snap like twigs unless you’re going long on the drying phase. If the outsides are crispy but the insides still have moisture, you’re in the perfect spot to move into curing.
Skip the guesswork by using the “snap test” along with a handheld hygrometer to verify internal moisture. Rushing into jars with too much moisture invites mold. Waiting too long dries out terpenes and ruins texture.
Step 2: Transfer Buds to Glass Jars
Use wide-mouth glass mason jars. Fill each one to about 70 percent capacity. Leave room for airflow without packing the buds tight. Overstuffed jars hold heat and trap moisture, which leads to wet pockets, mold, and uneven curing.
Avoid using plastic containers. They can cause sweating inside the jar and static cling strips trichomes from your flower. For long-term shelf life and flavor protection, glass remains the gold standard.
Step 3: Monitor and Control Humidity
Ideal curing humidity sits between 58 and 62 percent RH. This allows moisture to redistribute evenly without drying the flower too quickly or encouraging microbial growth. Insert a small digital hygrometer into each jar so you know what’s going on inside. You cannot control what you don’t measure.
If RH is above 65 percent in the first few days, open the jar for several hours until it drops into range. If it stays above 70 percent, remove the buds completely and let them air out on a clean tray before returning to the jar.
Humidity control packs help maintain a steady curing environment, but they are not a fix for poor drying or rushed trimming. They work best once the buds are already in the target range.
Step 4: Burp the Jars Daily (Then Taper Off)
During the first week, open each jar once or twice a day for five to ten minutes. This releases excess moisture and refreshes the air inside. Rotate or gently shake the buds so they cure evenly on all sides. Some growers flip buds manually to avoid compression or flat spots that affect consistency.
After the first seven to ten days, reduce burping to every two or three days. Once the RH stabilizes between 58 and 62 percent, once a week is usually enough.
Some cultivators swear by a tiered burping schedule:
- Daily for week one
- Every third day for week two
- Weekly after that.
This strategy works well for humid climates or for dense strains that hold onto internal moisture longer.
Step 5: Cure by Strain and Structure
Each strain carries its own density, moisture content, and terpene complexity. Curing different strains together can cause one to overdry while another still sweats moisture. Cure each strain in its own jar or batch, especially if you’re working with breeder cuts, exotics, or clones like ours that express high resin levels.
If you’re growing multiple phenotypes or working with clones from phenohunted lines, separate them from the start so you can dial in curing conditions for each one. This is how you maintain consistent flavor and effect in every jar.
Step 6: Evaluate Progress and Let the Buds Mature
Cured cannabis smells deeper and smoother than fresh flower. That sharp green edge fades and terpene richness begins to dominate. If your jar opens with a rich, complex aroma and your buds burn clean with white ash, your cure is on track.
If your flower lacks aroma after two weeks, you may have overdried it or skipped the slow degradation of chlorophyll that gives cured cannabis its signature smell. This is one reason new growers end up disappointed even after growing great genetics.
Let your nose and smoke tell you when it’s done. Most buds reach their peak around week four to six. You can extend the cure up to eight weeks or more for retail readiness, long-term storage, or premium craft quality.
Best Practices for Curing Cannabis
Once the basics are locked in, leveling up your cure comes down to small habits and precise controls. These practices help you avoid costly mistakes and bring out the best in every bud, every time.
- Use glass mason jars, not plastic. Glass prevents sweating, keeps trichomes intact, and protects aroma better than any plastic container. Wide-mouth jars make it easier to inspect and handle your buds without damage.
- Never overfill your jars. Keep jars about 70 percent full. Packed jars prevent airflow, cause uneven curing, and increase the chance of mold or wet spots.
- Always monitor internal RH with digital hygrometers. Visual checks are unreliable. Internal humidity is what matters, and even a small variation can wreck a cure.
- Burp with intention, not by habit. Open jars fully during early curing, allow air exchange, and flip or gently rotate buds by hand. After RH stabilizes, reduce burping to avoid unnecessary oxygen exposure.
- Handle buds carefully. Every time you touch your flower, you risk stripping off resin and disturbing trichomes. Use gloves or clean hands and avoid smashing or overhandling your product.
- Avoid light exposure at all costs. Light degrades THC and terpenes over time. Store jars in a cool, dark cabinet or use opaque containers to shield your buds.
- Group buds by size and strain. Smaller buds dry and cure faster than large colas. Keeping them separate helps you avoid uneven results and keeps curing conditions dialed in for each group.
- Don’t rush the dry phase before curing. Rushing through drying leaves chlorophyll trapped in the flower. That’s where that grassy, hay-like taste comes from.
- Use humidity control packs only after RH stabilizes. They help maintain, not fix, moisture levels.
- Trim style affects cure. Wet trimming exposes more surface area and speeds drying, while dry trimming protects trichomes and slows the process. Choose based on your strain and drying setup.
Curing Is the Grower’s Signature
Anyone can grow a decent plant with good lighting, soil, and genetics. What separates decent from unforgettable is what happens after the chop. Curing is the last move that decides whether your buds hit smooth or sit forgotten in the jar.
This step is not glamorous. No one posts burping videos or humidity logs. But this is where real growers separate themselves. This is where loud flavors get louder, terpenes hold their edge, and every jar you open brings that room-filling nose you worked for.
Take the time. Do it right. Let your flower speak for itself, and if you’re growing large amounts, be sure to learn how to store weed properly so it doesn’t go bad.
Start with Strong Genetics to End with Fire Buds
Curing begins with great flower, but greatness starts with genetics. If you want your buds to smell louder, taste sweeter, and hit harder after curing, you need consistent, high-THC clones that finish strong. Skip the guesswork.
Get elite, phenohunted cannabis clones delivered straight to your door from Marijuana Clones Online.